Scentsational Christmas card

By: Bussakorn Mpelasoka, Stampin’ Up! ® Independent Demonstrator, Canberra

Christmas is not too far away, so I decided to start working on Christmas cards, gifts and gift tags. The new Christmas stamp sets I like are so popular, they are currently out of stock and I have to wait for another two weeks or so to get them. So I will be using the retired stamp sets for now. I love Stampin’ Up! stamps so dearly, they will never be retired from my collections anyway.

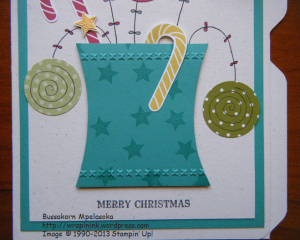
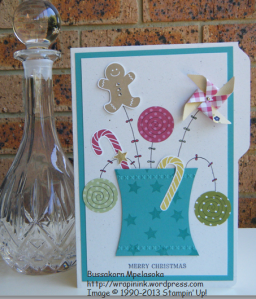
For today’s card, I used the candy cane, gingerbread man and star stamps from the ‘Scentsational Season’ stamp set. The card base is Natural White card stock.

Scentsational xmas card 1

I added a pinwheel (using the retired pinwheel Sizzlits S die) and three candies (using 1 1/4” circle punch).

Scentsational xmas card 3

I used Bermuda Bay card stock for the pot, embossed the top and bottom with the cross stitch ‘Needlepoint Border’ embossing folder.

Scentsational xmas card 4

I used the ‘envelope punching board’ to create a file folder look.

Scentsational xmas card 2

To see all current Stampin’ Up! products and project ideas, visit Stampin’ Up! Annual Catalogue.

If you have any questions, please feel free to email me.

To order Stampin’ Up! products, you can either email me or click shopping online.

Thank you for stopping by & happy crafting!

My signature


Thank you cards

By: Bussakorn Mpelasoka, Stampin’ Up! ® Independent Demonstrator, Canberra

I need three ‘thank you’ cards that are not the same, but similar. These are what I came up with.

Thank you cards group

I used Whisper White and Strawberry Slush card stock, the large oval stamp from the ‘Oh Hello’ stamp set (in Brushing Bride ink, then sponge lightly on some spots with Strawberry Slush ink), ‘thank so much’ stamp from the ‘Simply Sketched’ stamp set and some tearing edges for all the three cards.

Then I added stamps from the ‘Thoughts & Prayers’ stamp set and ‘Itty Bitty’ flowers on two of the cards,

Thank you card 1  Thank you card 2

and a stamp from the ‘Simply Sketched’ stamp set and ‘Boho Blossoms’ flowers on one of the cards.

Thank you card 3

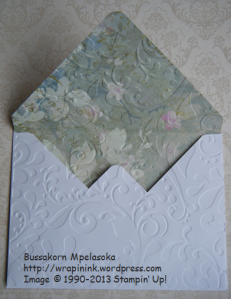
I used the ‘envelope punching board’ to make an envelope for each card.

Thank you card envelope

To see all current Stampin’ Up! products and project ideas, visit Stampin’ Up! Annual Catalogue.

If you have any questions, please feel free to email me.

To order Stampin’ Up! products, you can either email me or click shopping online.

Thank you for stopping by & happy crafting!
My signature

SU ink refill storage boxes

By: Bussakorn Mpelasoka, Stampin’ Up! ® Independent Demonstrator, Canberra

Today’s project is storage boxes for Stampin’ Up! ink refills. Each box can store 10 bottles. They are so easy to make – measurements included below.

Box 1, I used black card stock and decorated with butterflies (Gingham Garden DSP, Beautiful Wings Embosslits) and strips of Pear Pizzazz and Strawberry Slush card stock.

Ink refill storage box 1

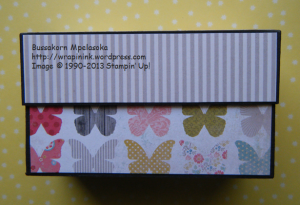
Box 2, I used ‘My Mind’s Eye’ designer paper with butterfly pattern (bought at the craft show in Canberra last August).

Ink refill storage box 2

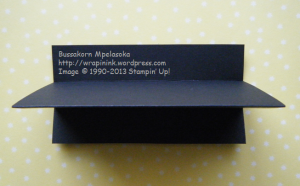
I also made a partition for each box,

Ink refill storage box partition

so the bottles can stand in two rows of five and I can separate the two sets of the In-colours.

Ink refill storage box inside

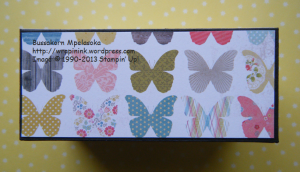
I decorated the top of the lid with the butterfly pattern paper (instead of the embosslit butterflies),

Ink refill storage box top

so I can stack them on top of each other.

Ink refill storage box group

Measurements:

Box body:            8 1/8” × 11 1/8”, score at 3” on all four sides

Box lid:                 5 1/4” × 8 1/4”, score at 1 1/2” on all four sides

Partition:             5 1/16” × 7 3/4”, score at 1”, 3 7/8”, 6 3/4”

To see all current Stampin’ Up! products and project ideas, visit Stampin’ Up! Annual Catalogue.

If you have any questions, please feel free to email me.

To order Stampin’ Up! products, you can either email me or click shopping online.

Thank you for stopping by & happy crafting!

My signature